
How to crochet an octopus for beginners step by step
|
|
Time to read 6 min
|
|
Time to read 6 min
Table of content
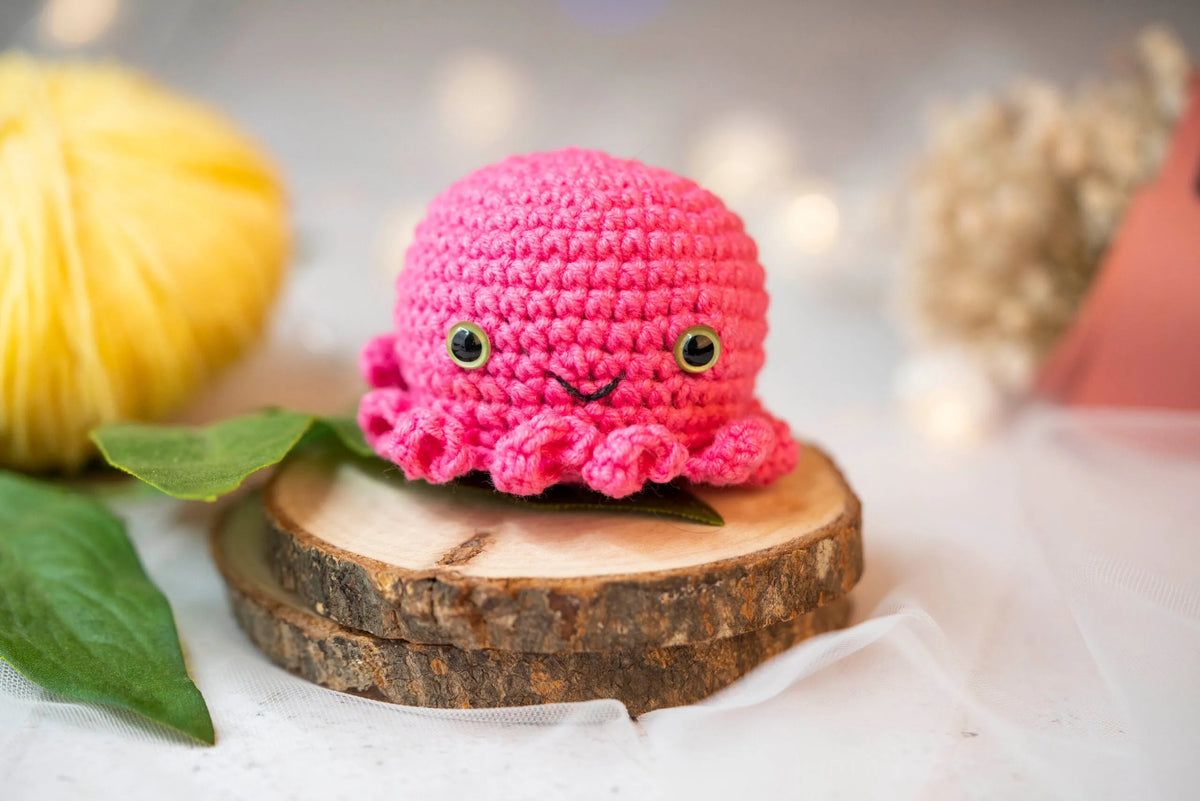
Crocheting an octopus is a delightful project that combines creativity and skill, making it a favorite among crafters. These charming sea creatures can be made in various sizes and colors, making them perfect for gifts, decorations, or even as comforting toys for children. To begin your journey into crocheting an octopus, it’s essential to gather the right materials and follow a clear pattern.
Start by selecting medium-weight yarn in colors of your choice, such as vibrant pinks, blues, or classic purples. A 4mm crochet hook is typically recommended for this yarn weight, allowing you to create tight stitches that will hold the stuffing securely. Safety eyes can add personality to your octopus, while a tapestry needle will help you sew pieces together and weave in ends.
The process generally begins with a magic ring, where you’ll crochet the body in rounds, gradually increasing stitches to form the shape of the octopus. After completing the body, you’ll create the tentacles separately, which can be styled in various ways for added flair. With patience and practice, you’ll soon have a delightful crochet octopus that showcases your crafting skills and creativity!
💡 Did you know
The history of crochet octopuses is relatively recent, gaining popularity as part of the amigurumi trend in the late 20th century. These charming creations have become beloved among crafters for their cute appearance and versatility. One notable aspect of crocheted octopuses is their use in neonatal care; many hospitals have adopted them as comfort toys for premature babies. The tentacles mimic the umbilical cord, providing a sense of security to infants in incubators. This initiative has led to a surge in patterns and tutorials available online, making it easier for crafters to create these adorable and meaningful toys.
Whether you’re a beginner or an experienced crocheter, this step-by-step guide: How to crochet an octopus, will help you create your own adorable octopus. With just a few materials and some basic crochet techniques, you’ll have a lovely amigurumi octopus to cherish or gift! It's easy to crochet in almost the same steps as the previous mentioned animals: shark, frog, mouse and elephants, so get started!
Magic Ring: Start with a magic ring and work 6 single crochets (sc) into it.
Increase Rounds:
Add Safety Eyes: Insert safety eyes between rounds 8 and 9, with 8 stitches between them.
Decrease Rounds:
Stuff the Body: Shape it like a ball and fasten off with a long tail to close the gap.
Tentacle Base: Start with a magic ring and work 8 sc into it (8 stitches).
Increase: Round 2: Inc x 8 (16 stitches).
Create Tentacle Shape:
Yarn
Weight: Medium-weight yarn (worsted weight, category 4) is typically recommended for octopus patterns.
Colors: Choose vibrant colors such as purple, blue, or pink for the body, and contrasting colors for the tentacles and other features.
Crochet Hook: A 4mm (G/6) crochet hook is commonly used for medium-weight yarn, but you can adjust the size based on your tension and yarn choice.
Safety Eyes: 12mm safety eyes are ideal for giving your octopus character. If making for young children, consider using embroidered eyes instead for safety.
Stuffing: Polyester fiberfill is commonly used for stuffing amigurumi. Ensure you have enough to give your octopus a plush appearance.
Tapestry Needle: Used for sewing pieces together and weaving in ends. A large eye is ideal for thick yarn.
Scissors: A good pair of scissors is necessary for cutting yarn and trimming ends.
Stitch Markers: Helpful for keeping track of rounds and stitch counts, especially in complex patterns.
Measuring Tape or Ruler: Useful for measuring the size of your project and ensuring accuracy.
Crochet Pattern: A clear and detailed pattern is crucial for your project. Look for patterns that include step-by-step instructions and images.
Optional Embellishments: Flower or Accessories: You may want to add decorative elements like flowers or other embellishments to personalize your octopus.
Understanding the Pattern: Before starting, take the time to thoroughly read and understand the crochet pattern. Pay attention to:
Maintaining Consistent Tension: Consistent tension is vital for achieving a uniform appearance in your octopus. Here are some tips:
Using Stitch Markers: As you work in rounds, it’s easy to lose track of your starting point. Using stitch markers can help:
Stuffing the Body: Proper stuffing is crucial for the shape and appearance of your octopus:
Attaching Safety Eyes: If using safety eyes, attention to detail is critical:
Creating Tentacles: Tentacles are a defining feature of an octopus, and their design requires focus:
Assembling the Octopus: The assembly process is where your attention to detail truly shines:
Weaving in Ends: Finishing touches are just as important as the crochet process itself:
Final Inspection: Before considering your octopus complete, take a moment for a final inspection:


