
Learn How to Do Corner to Corner Crochet (C2C)
|
|
Time to read 6 min
|
|
Time to read 6 min
Table of content
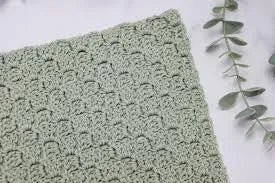
Corner to Corner (C2C) crochet is a captivating technique that allows you to create stunning, colorful projects with intricate designs. Unlike traditional crochet, where you work row by row, C2C crochet involves working diagonally from one corner to the opposite corner. This unique approach results in a visually striking fabric that is perfect for blankets, scarves, bags, and more.
Whether you're a beginner looking to expand your crochet skills or an experienced crocheter seeking a new challenge, this guide will walk you through the basics of C2C crochet. You'll learn how to create the fundamental building blocks of the technique, known as "tiles," and how to increase and decrease to shape your project. We'll also cover essential skills like changing colors and reading patterns, ensuring you have the knowledge and confidence to tackle any C2C project.
By the end of this guide, you'll be able to unleash your creativity and produce beautiful, one-of-a-kind creations using the C2C method. From cozy blankets to stylish accessories, the possibilities are endless. So, let's dive in and explore the exciting world of Corner to Corner crochet together!
💡 Did you know
Corner to Corner (C2C) crochet is a unique technique where you work diagonally from one corner to the opposite corner, creating a visually striking fabric. It involves crocheting small squares or "tiles" made up of double crochet stitches and chain spaces. C2C crochet is perfect for making blankets, scarves, bags, and other projects with intricate designs. The process starts with a single tile in one corner and increases each row until you reach the desired width. Then, you decrease each row to form the opposite corner. By following a graph or chart and changing colors, you can create stunning images and patterns.
Corner to Corner crochet, commonly referred to as C2C, is a method where you start crocheting from one corner of your project and work diagonally to the opposite corner. This technique involves creating small squares or "tiles," typically using double crochet stitches, which are joined together to form a larger piece. C2C crochet is particularly well-suited for making graphgans, which are blankets featuring detailed images or patterns created by changing colors throughout the project.
Benefits of C2C Crochet
C2C crochet offers several advantages:
Before you start your C2C crochet project, gather the following materials:
Abbreviations (US Terms)
To get started with C2C crochet, follow these steps:
Once you reach the desired width of your project, you will need to decrease to form the opposite corner. Decreasing involves eliminating one tile per row.
Changing colors is a vital aspect of C2C crochet, especially when working with patterns or images. Here’s how to change colors seamlessly:
After completing your C2C project, you will have several yarn ends to weave in. Use a tapestry needle to thread the ends through the stitches on the back of your work. This will help secure the yarn and keep your project looking neat.
C2C patterns can be found in various formats, including written instructions and graphs. Here’s how to read each type:
A C2C graph consists of a grid with colored squares representing different yarn colors. Each square corresponds to a tile in your crochet project. Follow the graph from the bottom left corner to the top right corner, changing colors as indicated.
Written patterns will provide step-by-step instructions for each row, including the number of tiles and color changes. Make sure to read through the entire pattern before starting to understand the overall project.
Once you’re comfortable with C2C crochet, you might want to create your own designs. Use graph paper to sketch your pattern, ensuring that each square corresponds to a tile. You can also use online graphing tools to create digital designs.
C2C crochet is perfect for a variety of projects, including:
Corner to Corner crochet is a fun and versatile technique that opens up a world of creative possibilities. With practice and patience, you can master the basics and create beautiful projects that showcase your unique style. Whether you’re making a cozy blanket or a charming wall hanging, C2C crochet allows you to express your creativity while enjoying the relaxing process of crocheting. So grab your yarn and hook, and start your C2C crochet journey today!


